|
|
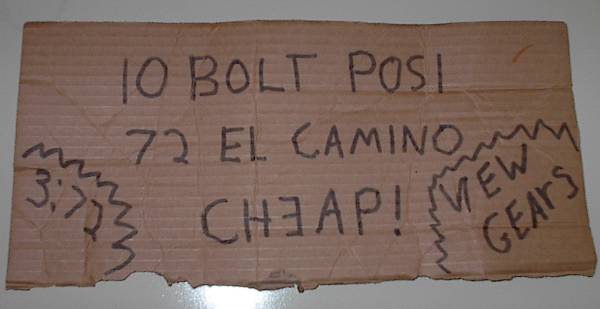
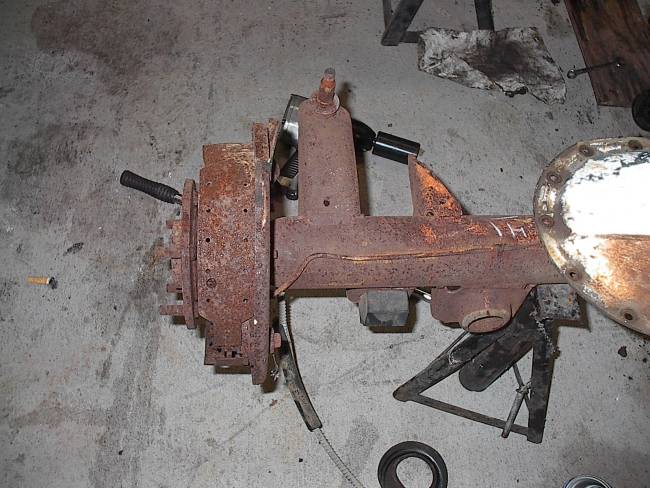
If you hand over your cabbage to a guy with no teeth who swears, "It came outta my buddies 72 El Camino and it was working great when he got drunk and hit that big 10 pointer offa the Big Snot Bypass blah blah blah..." You could come home with a mystery axle like this: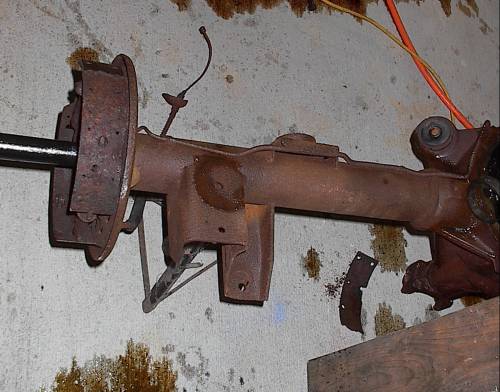
If your lucky then the chunk out of it may actually fit in your Chevelle diff housing like this: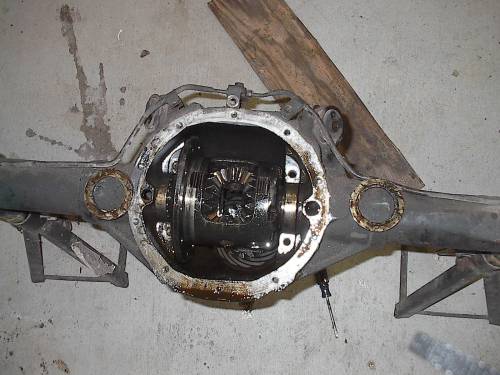
Just remember to always keep your head because if it looks too good to be true then it probably is.
This scenario is purely hypothetical and has been written in an attempt to prevent TOTAL MORONS WHO SHOULD BE BEATEN ABOUT THE HEAD REPEATEDLY WITH A YUGO MUFFLER FOR ABOUT SIX HOURS from making mistakes when purchacing rear ends from toothless guys who reside in Alabama. Neither Sprag nor Stall would ever make such an easily avoidable error.
After regrouping on the whole rear end thing we decided to go with a new Eaton posi, all new bearings and seals, and a 3:42 gear. Spag got excited and bought the stuff from a supplier in Atlanta. He paid way too much but we didn't have to wait. (Sorry Freddy)
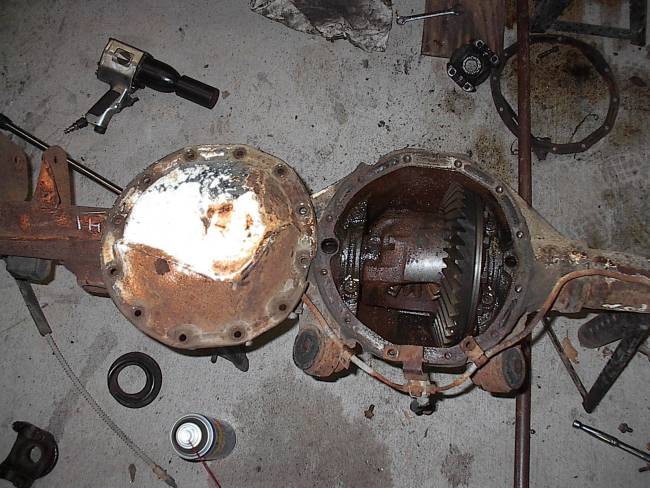
We took the backing plates off, pulled the gears, races, seals etc. out and slathered the whole thing down with naval jelly (You can either buy it or get it out of your navel. We saved some cash and used the latter). After a lot of brushing and scraping we were ready for re-assembly.
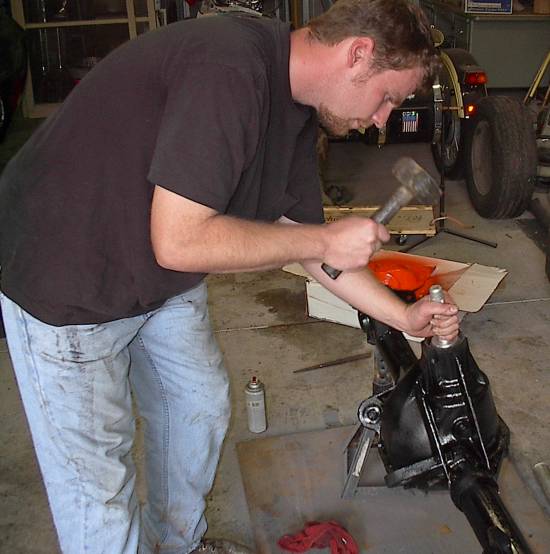
When installing the pinion we opted for the cheap route. A good friend who is a mechanic at a big Chevy dealership poo-pooed the pinion adjustment and advised just using the old pinion shim and eye-balling the pre-load. You can forget about tightening a pinion nut without an impact wrench unless you have a good way to hold the pinion stationary. Our impact is a pretty good one but wasn't up to the task. We had to borrow one. (Thanks again Mark!)
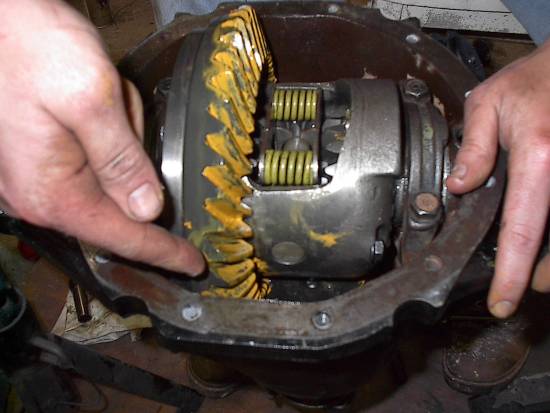
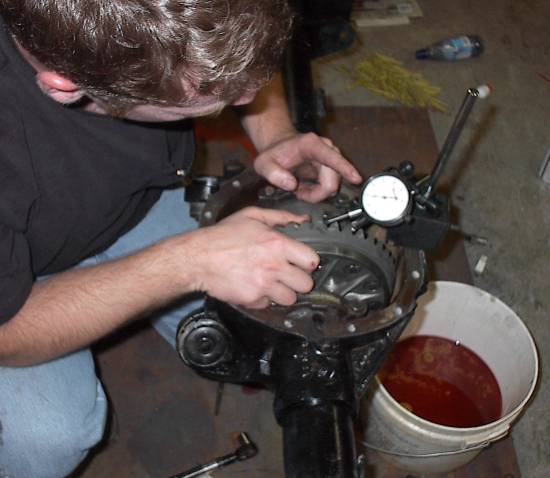
With the pinion installed and adjusted we set the backlash to .005 with the shim kit. The book said .005 to .008 so we just let it fly. We then proceeded to slather the ring gear with the cool yellow dye, (looks like mustard, tastes like crap. Don't put it on a weenie.) and spin it around. After another look at the book we noticed the word SPARINGLY and had to start over. The pattern looked just like the good one in the book so we let it go.
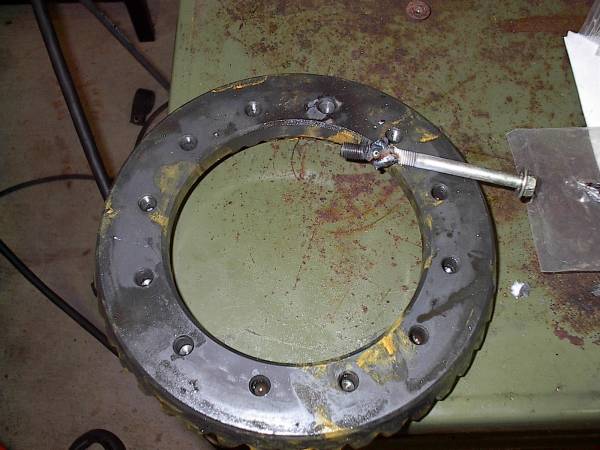
Believe 75% of what you hear and maybe 80% of what you see. You just can't torque a 7/16 bolt to 90 ft/lbs! We knew it yet blindly followed the manual. Head bolts aren't even torqued that tight and the carrier bolts in the diff are only 60 ft/lbs! We're both firm believers in doing things by the book but sometimes the damn book is just wrong. What the hell is an Arkansas stone anyway? Fortunately, we were able to weld a bolt onto the broken one and get it out without scrapping the gear.
The book calls for .005-.008 backlash. This was verified by Freddy, aka, Big Gear Head. That bucket is full of the vomit we hurled after breaking that bolt off.
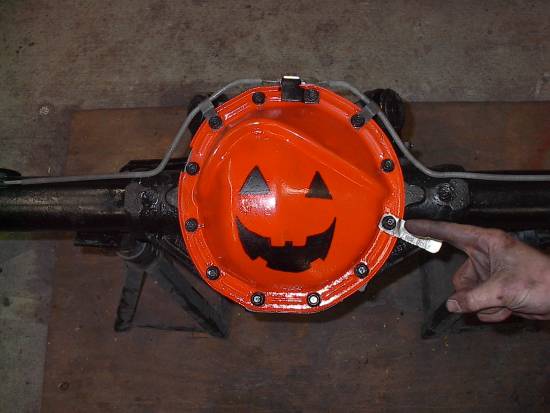
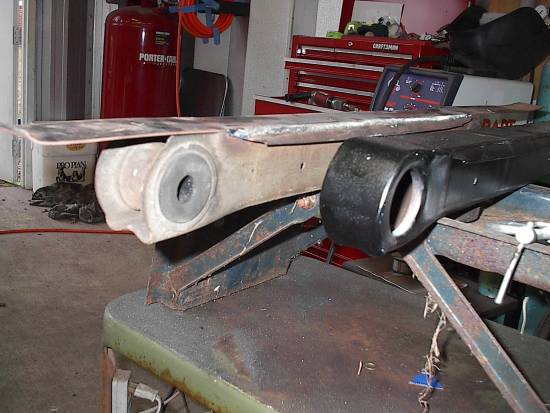
It's called a pumpkin, right? We decided to go cheap and box our own control arms. The one on the right is complete.
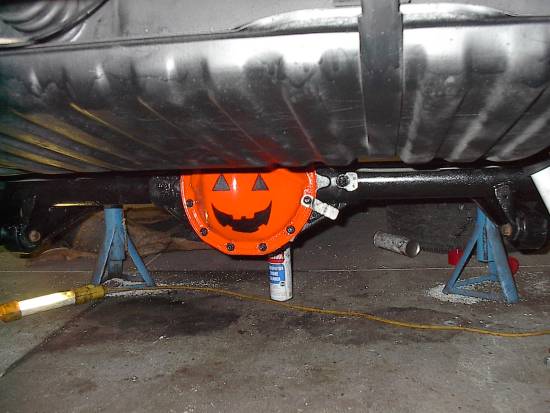
There it is. The 12 bolt posi. Check out the LIMITED SLIP tag. It's the only thing we used off that swap meet wonder rear.
This is when the trouble started.
This is what we're back too after Sprag BROKE a ring gear bolt off!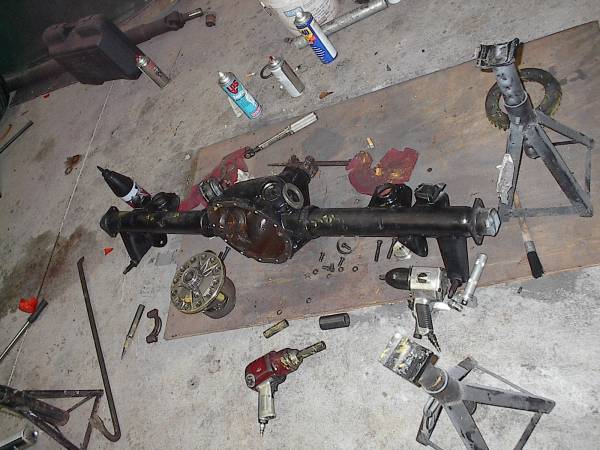
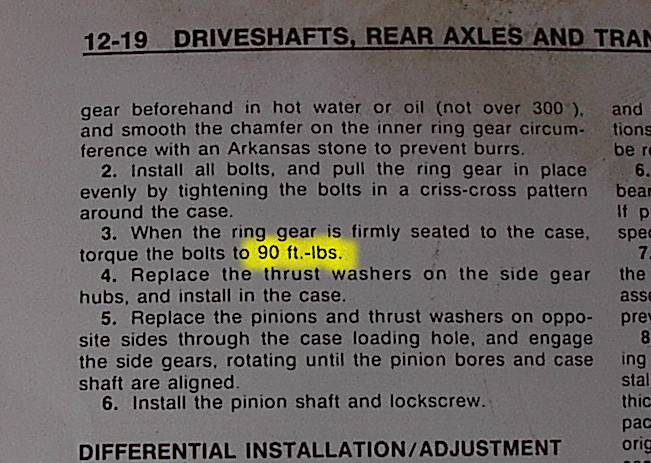 Did you read that? Read it again just to be sure! That came out of the Peterson's BIG BOOK OF AUTO REPAIR 1981. It was under :DIFFERENTIAL OVERHAUL All 1970-80 GM cars (Except Cadillac, Eldorado, Oldsmobile Toronado,Corvette,1970-80 Buick Riviera).
Polyurethane vs polygraphite vs RBB
After some research and debate we decided on RBB (regular black bushings) for the control arms. All the magazines are touting the benefits of the new polysaturated tufftrided molypregnated wonder bushings and they have the skidpad results to sell them. We asked a few people who had updated to these components if they were worth it and most said they were OK and some complained about increased transferrence of road and drivetrain vibration to their asses. The bottom line is that a 1970 Chevelle is just not going to handle like a Mazzariti Testicle-Uno or whatever. We went with good old Korean made Moog upper and lower control arm bushings. The boxes were made in the USA.
WE HOPE IT WORKS